MCP Service
Expose CapSolver’s solving capability to AI agents through the Model Context Protocol. Any MCP client that points at this service gains five solving tools — with no glue code.
1. Overview
The Model Context Protocol (MCP) is an open protocol that lets AI clients discover and call external tools. You package a capability as an MCP service, and any compatible client can use its tools directly upon connecting — without writing per-client adapter code.
capsolver-mcp is exactly such a service: it wraps capsolver-core’s solving capability as standard MCP tools. Once started, MCP-capable clients (Claude Desktop, Claude Code, Cursor, Cline, and others) automatically discover the tools and can call them directly in conversation to detect, solve, and fill back — clearing CAPTCHAs.
This route suits two kinds of people best: users who want plug-and-play solving inside the AI client they already use, without writing a line of integration code; and developers who want to provide solving capability to a team’s many clients through one unified protocol.
Official MCP Registry
CapSolver MCP is published in the official MCP registry under io.github.capsolver-ai/capsolver-mcp.
The Registry provides verified package metadata, version information, installation details, and the official GitHub repository.
Run the latest published version:
uvx capsolver-mcp2. Installation
capsolver-mcp is built on top of capsolver-core — the core does the actual solving, and mcp only exposes its capability over the MCP protocol — so it depends on capsolver-core at runtime. You can’t install mcp alone: install core from GitHub first, then mcp:
# 1) Install the core engine first (mcp depends on it)
pip install capsolver-core

# 2) Then install mcp itself
pip install capsolver-mcp
The browser tools (detect / solve_on_page) also need Playwright — replace step 2 with the [browser] extra and install Chromium:
pip install capsolver-mcp[browser]
playwright install chromium
3. The Tools
Once started, the service advertises the following five tools to the client:
| Tool | Browser? | Description |
|---|---|---|
solve_captcha | No | Solve by type + site parameters (Token mode) |
detect_captchas | Yes | Scan a page URL and list the CAPTCHA types present |
solve_on_page | Yes | Detect + solve + fill back every CAPTCHA on the page |
get_balance | No | Query account balance and packages |
get_supported_captchas | No | List all supported CAPTCHA types and handlers |
The browser tools (detect_captchas, solve_on_page) require the [browser] extra and Chromium — just install with the browser instructions above.
4. Starting the Service
4.1 Command line
# stdio (default — for local MCP clients such as Claude Desktop)
capsolver-mcp

# SSE (for remote / HTTP access)
capsolver-mcp --transport sse --host 0.0.0.0 --port 8000

# Streamable HTTP (MCP 2025-03-26 spec)
capsolver-mcp --transport streamable-http --host 0.0.0.0 --port 8000
Command-line options:
capsolver-mcp [OPTIONS]
  --transport {stdio,sse,streamable-http}   Transport protocol (default: stdio)
  --host HOST                 Bind host for SSE/HTTP transport (default: 127.0.0.1)
  --port PORT                 Bind port for SSE/HTTP transport (default: 8000)
  --api-key KEY               API key (falls back to the CAPSOLVER_API_KEY env var)
  --name NAME                 Service name (default: capsolver)
4.2 MCP configuration
An MCP client loads this service through a block of JSON config. The most common is the stdio approach: the client launches the service as a child process using the command you provide. Set command to the bundled capsolver-mcp directly:
{
  "mcpServers": {
    "capsolver": {
      "command": "capsolver-mcp",
      "env": {
        "CAPSOLVER_API_KEY": "YOUR_API_KEY"
      }
    }
  }
}
If the client reports that it can’t find capsolver-mcp (common when it’s installed in a conda / venv environment that isn’t on the client’s PATH), point command at that environment’s Python and launch via the module:
{
  "mcpServers": {
    "capsolver": {
      "command": "/abs/path/to/venv/bin/python",
      "args": ["-m", "capsolver_mcp"],
      "env": {
        "CAPSOLVER_API_KEY": "YOUR_API_KEY"
      }
    }
  }
}
5. Client Setup & Tool Demos
Most MCP clients connect with the config block from §4.2. Below are the specific steps for VS Code, a few tool demos, and the differences for other clients.
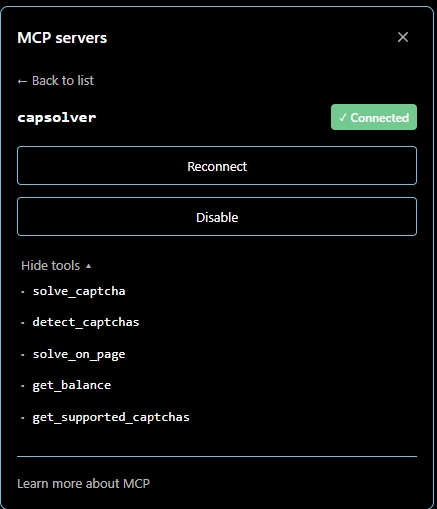
5.1 VS Code (Claude plugin)
- Create a new
mcp.json. - Add the corresponding configuration under
mcpServers. - Reload VS Code. After the reload, CapSolver’s five tools appear in the tool list.
5.2 Tool demos
Just use natural language to have the client call a tool. Here are three typical uses and their expected results:
- Check balance — “Use capsolver to check my account balance.” The client calls
get_balanceand returns the balance and packages.

- Token-mode solve — give the type, URL, and site key: “Solve this reCAPTCHA v2 for me.” The client calls
solve_captchaand returns a token.
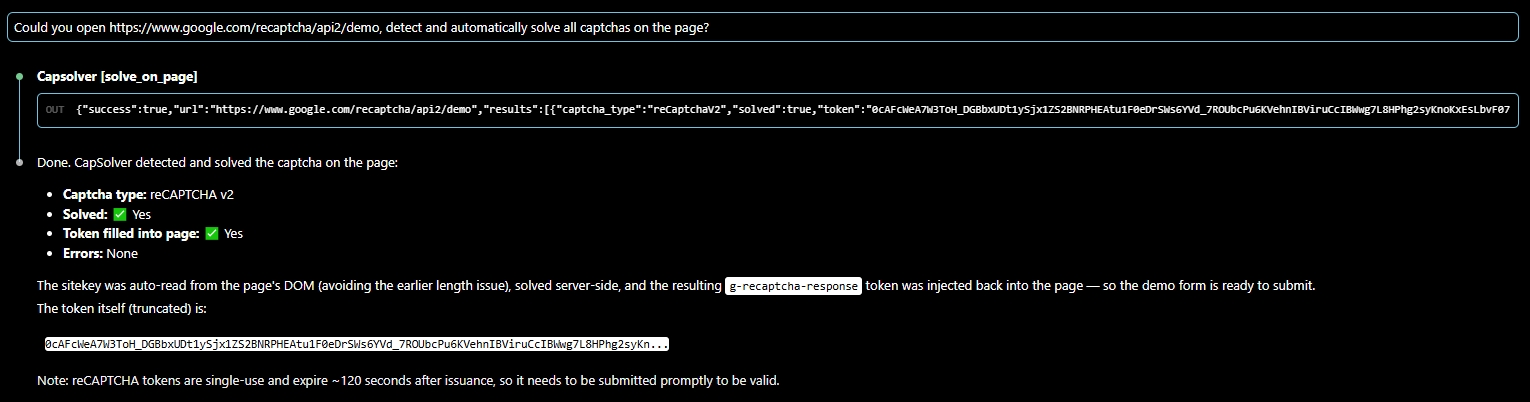
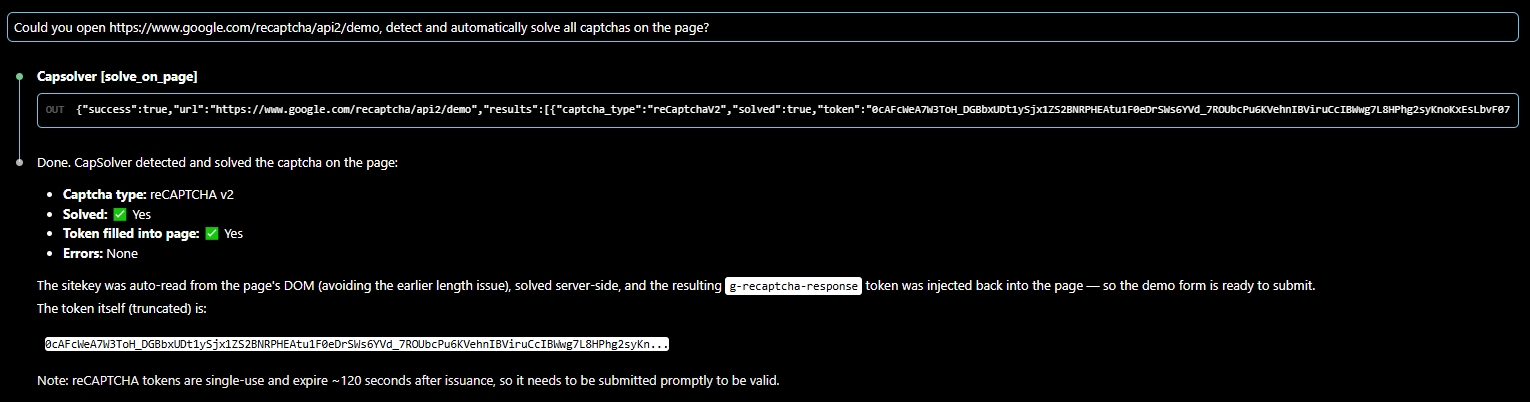
- Whole-page, one shot — “Detect and solve every CAPTCHA on this page: <URL>.” The client calls
solve_on_pageto detect + solve + fill back.
5.3 Other clients
The same command + env config applies to other stdio MCP clients. Here’s Cursor as an example:
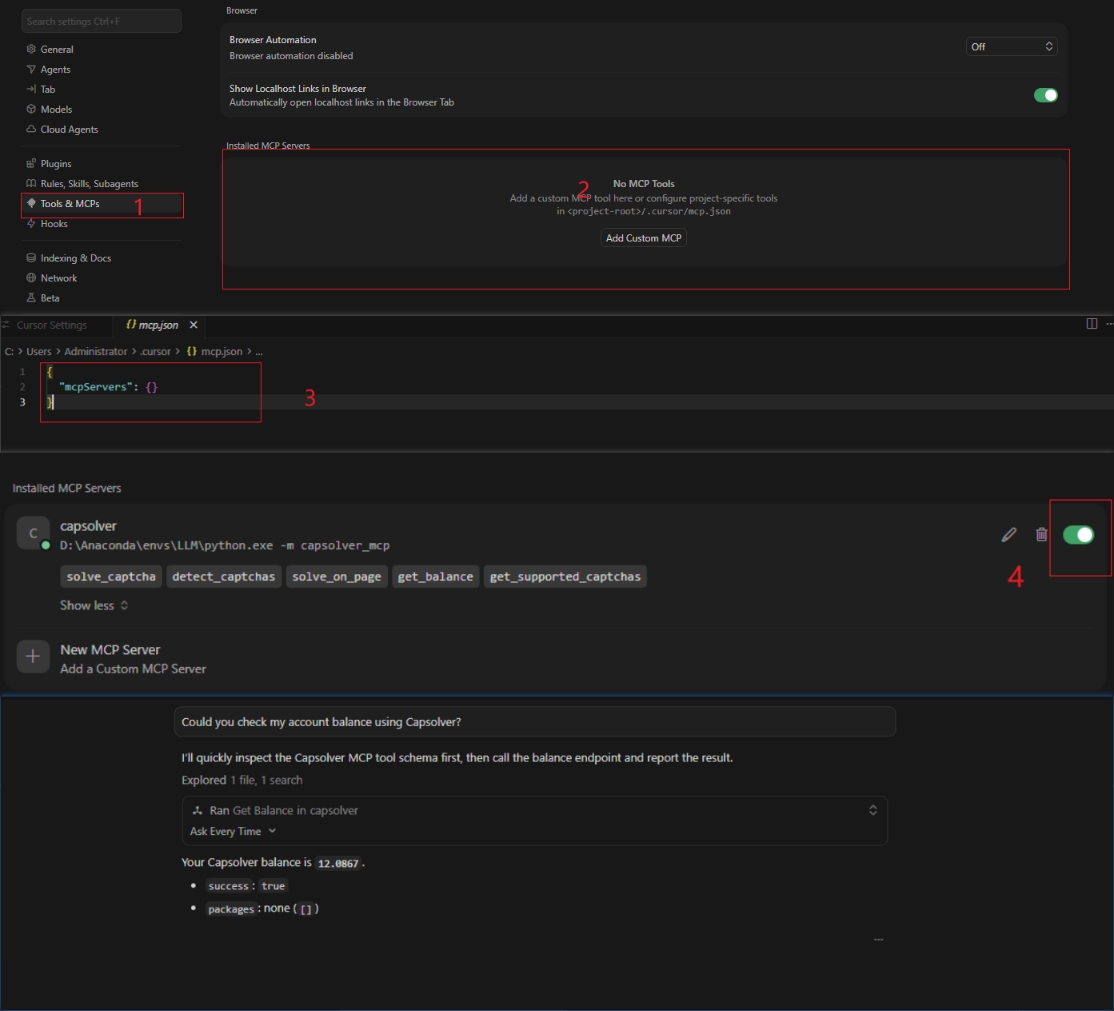
Note: the prerequisite for Cursor to connect to
capsolver-mcpis that both packages are installed:# 1) Install the core engine first (mcp depends on it) pip install capsolver-core # 2) Then install mcp itself pip install capsolver-mcp